Data Synchronization
Overview
Delta sync lets users update only the data that has changed since the last sync, making data transfer from SAP Business One to Logiks WMS much faster and easier. With this new feature, users can set what data and how often it should be synced in the background, and they can also choose to sync manually if they want.
1. Accessing Data Synchronization Settings
Open Logiks WMS Mobile Application.
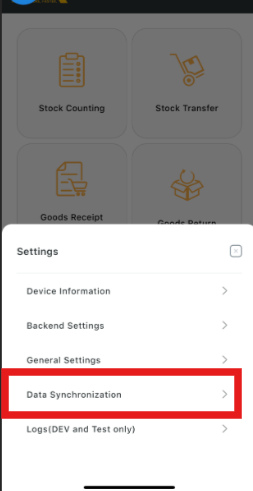
From the Dashboard, go to Settings.
Select Data Synchronization to view all available options.
2. Configuring Synchronization
When accessing Data Synchronization from the Settings menu in Logiks WMS, users can configure how and when data is synchronized from SAP Business One.
2.1 General Synchronization Options
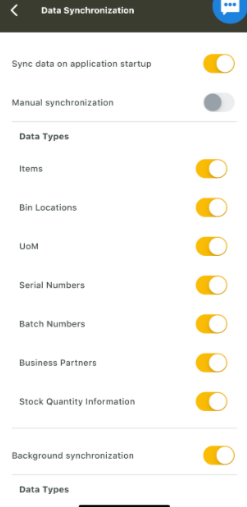
After opening Data Synchronization, you will see the following switches:
Sync data on application startup - On/OFF:
If enabled, synchronization will automatically happen every time the user logs in to the application.
Manual synchronization — On/OFF:
If enabled, a Sync button will be visible on the dashboard, allowing users to manually start synchronization when needed.
2.2. Data Types to Synchronize
Below the general switches, you will see a list of data types that can be included in synchronization. Each data type has an on/off switch so users can select exactly what they want to sync:
Items (Item Master Data) – on/off
UoM (Unit of Measures) – on/off
Bin Locations – on/off
Serial Numbers – on/off
Batch Numbers – on/off
Business Partners – on/off
Stock Quantity – on/off
2.3. Background Synchronization Options
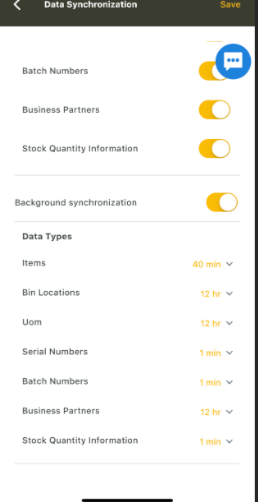
Scrolling further down in the Data Synchronization settings, you will find the Background Synchronization section.
Background synchronization - On/Off:
If enabled, Logiks WMS will automatically synchronize selected data types in the background based on user-defined intervals.
How to Set Up Background Synchronization:
For each data type, there is a dropdown menu where users can define how often that specific data type should be synchronized.
If you do not want to synchronize a particular data type in the background, select "None" from the dropdown.
If you want to enable background sync, choose one of the available intervals.
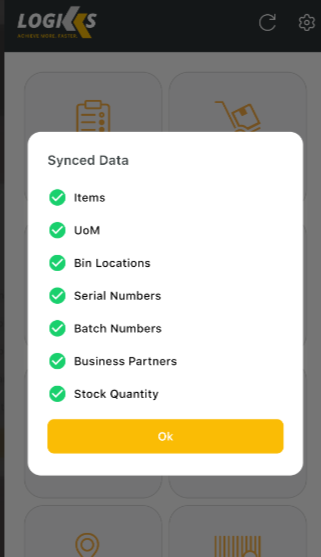
Manually Synchronize Data
If you have “Manual synchronization” On, you will see synchronization button on dashboard top bar. When pushed confirmation popup will appear.
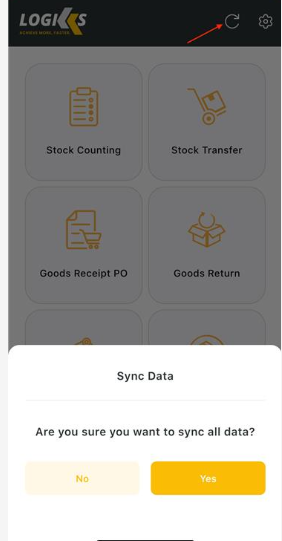
If you confirm the process, synchronization will start and in the end he will receive results, which data was successfully synchronized.